Close to my Heart scrapbooking and cardmaking products

I'm an independent Close to my Heart consultant! If you're interested in our wonderful line of products, you can check them out or order online on my website at: Francine.cmth.com.au


10 October 2011

Birds of Prey (show)


I realised that I hadn't shared my latest layout for the September Wrapped in Paper monthly challenge. I absolutely love it, partly because these photos turned out really awesome (to use today's parlance *grin*) and partly because I just like the layout of it. I used a sketch by Heidi Myers from the online publication  Scrapbook News and Review (SNR). I submitted my layout to SNR and it was published (yay!) on Nov 16th, 2011. So, if you're looking at this post in the 30 days following 16.11.11 you won't be able to see my take on the sketch. Check back later!!

Sketch by Heidi Myers
I wasn't very keen on the papers in this kit (again!) but made the best of them. The orange dotty paper that I used as the background had garish purple, orange, pink and black words on the other side that I couldn't work out how to use, so I just used the patterned side. The three pieces of cardstock were easy to layer. The sun ray striped paper, oh my, I don't like at all, but in small doses it's ok. There were a couple of orange and green leaves which naturally made me think autumn, but I've done several of those layouts already and wanted to do another subject. In the end I just hid them in my embellishment cluster, using the (Collections, I think) chipboard buttons that were also in the kit. I inked the star with some orange ink to give it colour and tied them all on with some jute string. 

I ended up punching some holes around the central photograph part. I goofed though so had to cover up the crooked line of holes. Can you guess how?! The two ribbons were also in the kit, so I used them for the "frame". the leaves were punched from the yellow cardstock with my Sizzlits Little Leaves die. 

I finished off the layout with some (brown) Scenic Route and mini Kaisercraft black/white letter stickers. Since I had too much to say, I typed it out and printed it on some of the orange dotty paper that I cut out of the middle. I don't like to waste paper, so I often cut the middle out of paper if I put another large piece over the top of it :-)
The photos by the way, were taken by me (yes really!) at the Birds of Prey Show at the Alice Springs Desert Park. If you get to Alice Springs this park is not to be missed! They have recreated the different kinds of desert that you will find in Central Australia in this one location. They have lots of plants, animals and birds to see from each type of desert. It's a very interesting place, and the show was particularly good. I never thought I'd think that non colourful  birds of prey would be interesting! I'm so pleased too that I caught the barn owl with wings starting to unfold, just about to take off. 

Well, I've been very busy scrapping this past weekend so hope to be back later and share some more of my work. 

Till next time, happy days!
Francine

3 October 2011

Desert Blooms


This layout was made for the latest PageMaps blog challenge using this sketch by Becky Fleck. I flipped it on it's horizontal axis. 


The photos are of some of the flowers we saw while we were in the Red Centre (Northern Territory, Central Australia) in July. For a supposedly dry desert area, there were quite a lot of flowers! I’m so pleased that we saw both the Sturt’s Desert Rose (second from the left) and the Sturt’s Desert Pea (main photo).  

I used paper scraps that I have had in my stash for a very long time! I die cut most of the papers to make the embellishments.

Here’s what I used for the top left embellishment cluster:
Papertrey Ink small Limitless layers die to make the doily frame, then layered it on top of
Papertrey Ink Fillable frames #10
Flower names printed onto paper and cut out with EK Success label punch from Stampin Up!
Leaves made with Sizzlits Little leaves (red ones) and SU 2 step bird punch (patterned leaves)

The title is made from Basic Grey (Fruitcake) stickers.

Bottom right embellishment cluster is made from:
Marianne Creatables LR0115 butterfly
EZ Cut Cut&Fold Flower#5 with a small Joy Crafts daisy flower in the centre
The red ‘flower’ was cut out from one of my kaleidoscope cards using the larger Papertrey Ink Limitless Layers die.

To finish it off I used a couple of pewter coloured brads and I used the Sew Easy paper piercer to pierce the holes for the stitched frame.

I love this layout, but then that’s nothing new, I generally like all my layouts when they’re first finished!!

Till next time, happy days!
Francine

2 October 2011

Always in our Heart

Oh my goodness, where did September go?! While I completed a few things I haven't posted anything, but I really wanted to show you this one!


This layout is one that I made with the August Wrapped in Paper monthly challenge kit. There was little in the way of paper in it, only one full sheet of  patterned paper (I can't remember the maker now), a half A4 sheet of gold and black striped paper and a half 12"x12" piece of Teresa Collins lace look paper. For the rest there were two flowers, a chipboard heart, two pieces of lace and a length of ribbon. The paper had a large carnival scene on one side so I used the reverse which was a deep maroon colour, although it is showing as more purple/red in this photo :(


I was inspired to make this layout by this one by Celeste Vermeend that I saw on the Scrap the Boys challenge site. I absolutely loved all the layering of papers and bits and pieces and just had to scraplift it. So thank you Celeste for the inspiration!


I ended up raiding my stash to find things to use. I found several papers and die cuts with gold to match the gold/black striped paper. I also embossed some black cardstock and then rubbed gold ink across it. I still had a few printed chipboard embellishments from an old TLC kit, and a frame that I picked up somewhere in my travels. I diecut some daisies from the papers as well as the large butterfly and doily. I stamped the "En Francais" (SU) background stamp on a label diecut and found a small printed vellum butterfly as well as a small metal key. I also added some buttons and scraps of a floral patterned paper and some gold corner stickers. The stark black and white Teresa Collins lace paper didn't go with the rest of the layout, so I used some fired brick distress ink to colour it. 


butterfly die cut from Marianne Creatables
The photograph is of my grandmother a few years before she died. The colours in the photo were all wrong with the papers so I turned it into a sepia tone picture (after much ado - but that's another story!). 


All in all I love the way this turned out, and the visitors to Wrapped in Paper obviously thought so too since I found out today that I won the September monthly challenge! Yippee!


Padlock and key - spellbinders die cut
I'll leave you with some more close-ups.


Till next time, happy days!
Francine

5 September 2011

10 Years, 10 Houses

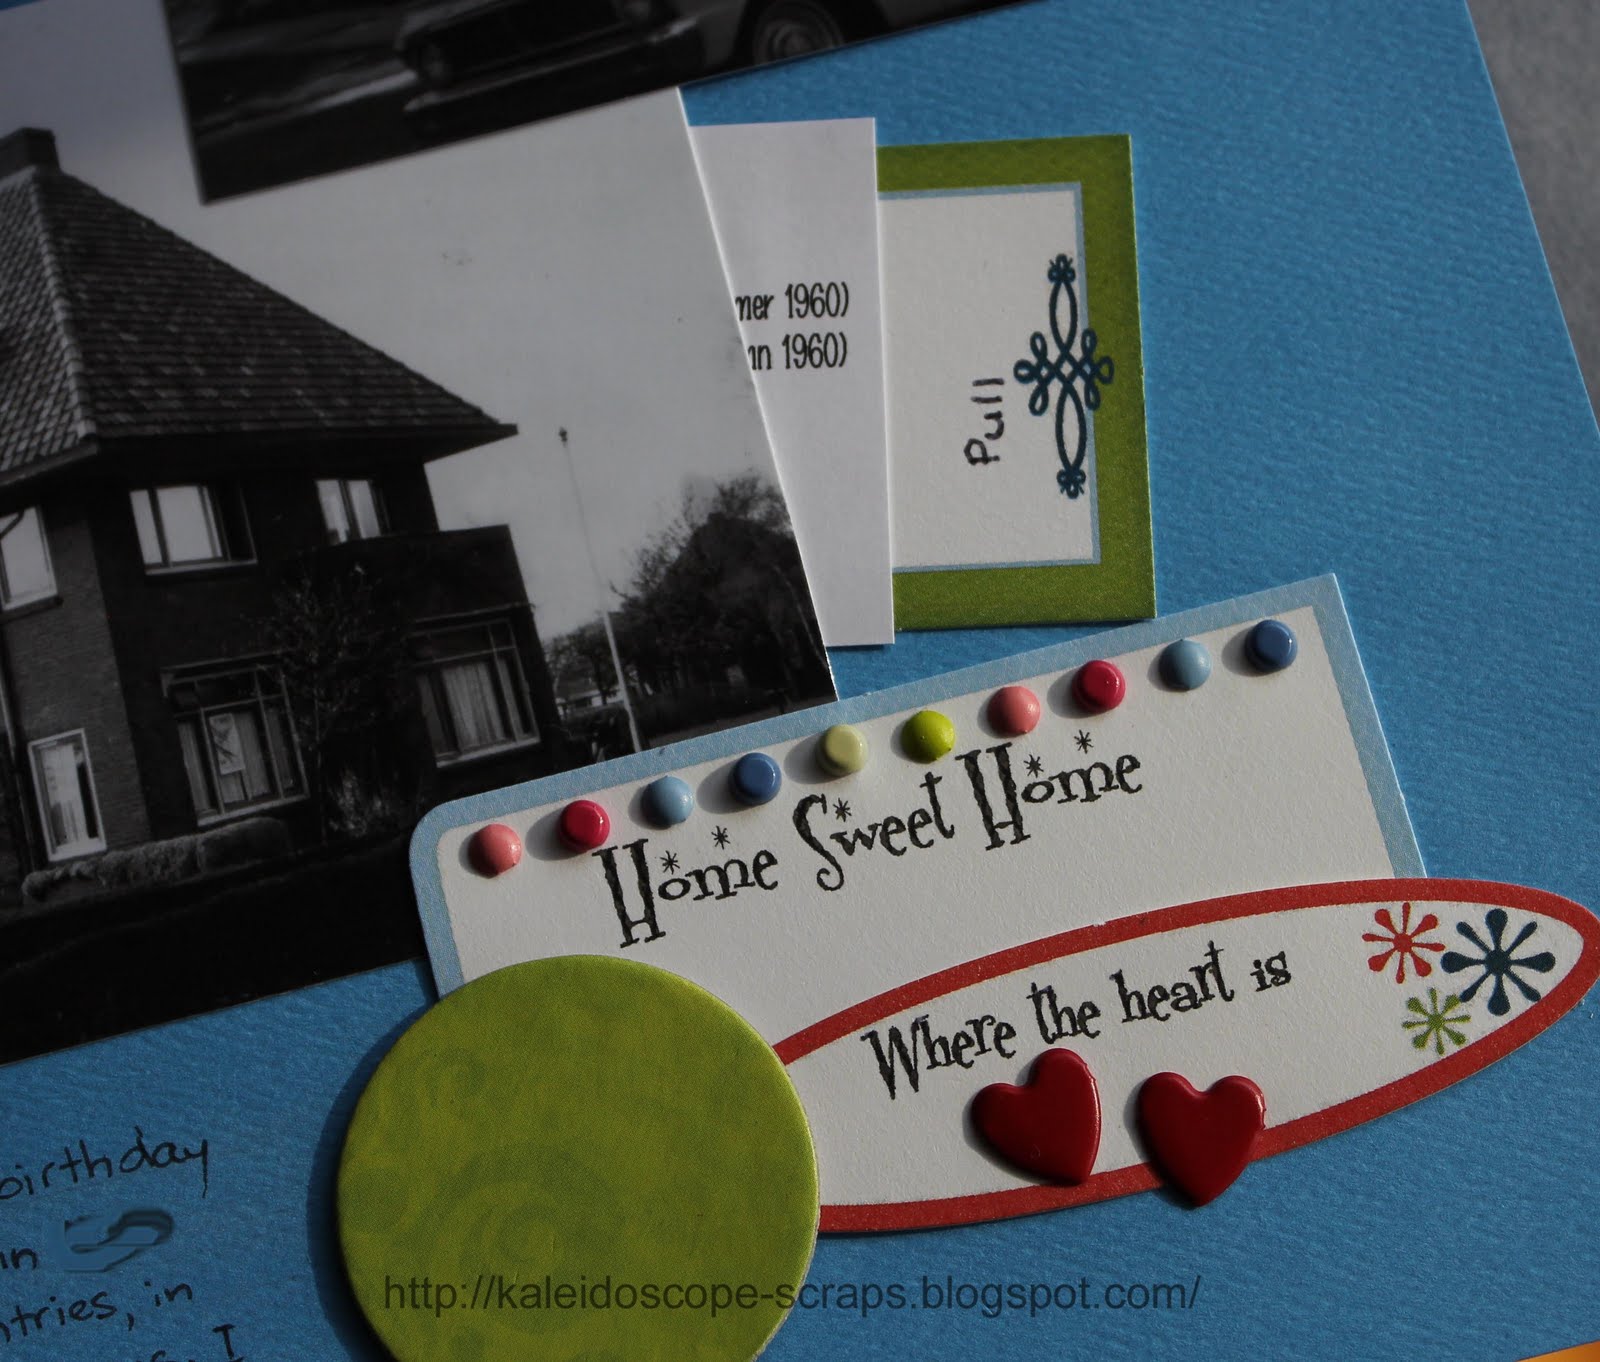
Just a quick post to show you my latest challenge entry. This one is for Southern Girls Decade Challenge. When I was ten I remember my mother telling me that in my first ten years of life I had lived in 10 houses already! So – that’s my decade, and this is my layout – 10 years, 10 houses. I used cardstock and papers from the TLC Runway Retro collection. The ribbon, ribbon slide, number stickers and labels in the bottom right are all part of the same collection. The chipboard circles are also TLC, but from another kit – I can’t remember which one. I added a few brads, some Dymo tape and a house ad from the 1950’s that I downloaded from Tack-O-Rama. For the title, since I’d already used the 1 and 0 stickers, I cut around the little patterned bits that were left over after removing the sticker and used them instead (see, I never waste even the smallest bits!) I created a hidden journaling card behind the bottom picture and listed the addresses of all 10 houses. Thankfully I had the list from the 50th anniversary album I created for my parents a few years ago. My mother has a great memory and could tell me all the addresses!


I used sketch #62 by Susan Stringfellow from Sketch Savvy (although I flipped the photos horizontally).


Till next time, happy days!

Francine

28 August 2011

Father/Dad

(Poor picture quality - sorry! Despite it being a sunny day I still got glare, and I took several photos before I gave my perfectionism away!)

I decided fairly last minute that I would enter the latest Get Picky sketch challenge. With Father’s Day coming up soon I decided it would be good to make a layout about Gary and chose these two photos of him and the children I thought were nice. As I’ve always loved the saying “Any man can be a father, but it takes someone special to be a Dad” I decided (unlike me) not to do any journaling and leave it with the quote. I did write the dates of the photos on the back of the page though *wink*.

The challenge was to use this sketch.


For the layout I used lots of things from my stash. I’m mostly trying to do that at the moment, but because I can’t help myself when I see nice things, I still do have some new things too. Here’s what I used:


· Cardstock: My Mind’s Eye (Penny Lane) (new from the Craft Show)
· Cream patterned paper: TLC (stash). I cut the word Dad from this paper too using Cuttlebug Curls and Swirls alphabet die.
· Brown ribbon and brown/white flowered paper (American Crafts) – left over from an LSS challenge. I cut the word SPECIAL, the small hearts, the arrow and the asterisk out of this paper with my Cuttlebug Typewriter alphabet die, and the two snowflakes with my (new from the Craft Show)
Marianne Creatables die (LR0125).
· Brown chipboard tag and string – clothing label
· Brown stamped love heart – leftover from a Kaszazz workshop I hosted some time ago (stash)
· Dad acrylic word – Go West word chime coloured with pinecone Versamark ink (stash)
· Large round brads – from an
Apron Strings kit (stash)
· Small metal button – Smart Kraft (new)
· Lace – unknown (stash)
· Butterfly – Porta Craft (stash)
· Brown jute string – left over from a bit Kylie gave me for
this layout.
· Chipboard ribbon slide, pink heart, flourish (if that’s the right word for it!), and cream spotted ribbon – all TLC (stash)
· Small envelope – K&Company (stash)
· Metal letters (father) – unknown (stash)
· Dymo


Phew! That was a lot of stuff. I’ve been seeing lots of layouts on the net where people have clustered a number of small embellishments and wanted to try it, so this is my first attempt. Turned out pretty good I think. I want to try it again on my next layout. We’ll see how that goes again.

One last note about the Marianne Creatables snowflake die. I have been buying a few different cutting dies lately and absolutely love the Papertrey Ink and My Favorite Things (MFT) dies that I have. They cut very well and the die cut just falls right out. It is rare that paper gets caught in the die and if it does they have tiny holes that you can poke them out with a paper piercer. The two Marianne Creatable dies that I got at the Craft Show on the other hand, make the most beautiful die cuts (my other one is a butterfly - LR0115) but the paper sticks in the die. It takes about three times as long to remove the paper and all the little bits from the die as it does to actually cut it! It’s driving me crazy. So today I thought, what if I put a piece of wax paper between the die and the paper I’m cutting out. Well, that worked like a charm and the die cut just fell out. I have yet to try it on the butterfly die which is the worst one for keeping bits of paper in it after cutting, but I suspect it will work well too. So I guess I need to keep up my supply of wax paper now! Seeing as I have a nearly full roll of it from about 1990 though, I don’t think that will be a problem!!


Till next time, happy days!


Francine


17 August 2011

Soccer Fun


Here is my latest layout for the Scrap the Boys August Challenge. The challenge was to make a layout inspired by the picture at right. 

I was inspired by the red and blue stripes, and the large circle. While I was going to use striped paper, it turned out that I didn’t have any, but I found these papers in my stash instead. They’re from an old TLC Runway Playhouse Collection kit. The circle, blue ribbon and the number stickers are too. I also found the star diecut in my stash. From memory it is one of the first scrapbooking set of diecuts I ever purchased. I don’t know who made them though as the packaging is long since gone. I added the dots around the edge with my Sakura stardust pen. The small letter stickers are cherry red mini alpha stickers by Kaisercraft.


While this is a simple layout, loosely based on sketch number 1 by Donna Coughlin that I found on Love of Sketches, I love how it turned out. I think that the simplicity goes well with the action shots and team photo.


Well that’s it for now. Till next time, happy days.

Francine

7 August 2011

A Touch of Frost


I love how this layout turned out! I made it for the Southern Girls Challenge. This time it was a photo inspiration challenge with this photo of a tree on a frosty morning. Well, at the end of July we were having lots of frosty mornings, and one morning I ventured out to take a photo of the camellias which were covered in frost. So, I figured this was a good subject for the layout. The colours are nothing like the inspiration photo, but the idea was still there!
As anyone who has been reading my blog regularly will know, I love sketches. Well, I recently discovered a new site and it’s great! It’s called Sketch Support. Not only do they have sketches but you can download them for printing and they also include measurement and placement information as well as ideas for variations on the sketch. Go check it out! So, I was absolutely smitten by their last sketch and used this as the base for this layout.

I used a lot of things from my stash – leftover scraps of papers, Heidi Swapp ‘bordeaux’ ghost alphabet, Zva Creative bling (cutting off the flowers at the ends of the swirls), white Porta Craft pearls, white brads, an (originally black) CM snowflake die cut, and white sparkly string/thread.


After cutting the background papers, I covered one piece of pink cardstock with the white mulberry paper, and the other piece I embossed with the Cuttlebug ‘distressed snow’ folder. I then inked the raised areas with white Versamark ink and heat embossed it with some CM clear embossing powder mixed with dazzling diamonds.

After sticking the papers and photos down I remembered that I had some ‘pink taffy’ Glimmer Mist from a kit I’d bought and not yet made up and decided to mist the white (Bazzill) cardstock with that. I put down the ghost letters first as well as some punched snowflakes (using CM snowflake punch and Sullivan’s starburst punch) in the top corner and cut out some scrap paper to just cover the photos. I like how it turned out, even though I really should have misted before I attached the photos and paper!

I painted the black die cut with gesso and put some of the embossing powder/glitter mixture on before it dried to add some sparkle. I attached the ghost letters with the sparkly string/thread and cut the rest of the title out of the same paper as the middle rectangle with Cuttlebug ‘Baby Face’ dies (now discontinued), only I painted them with ‘moonlight’ Smooch. As I don’t like to waste anything, I embossed the centre of the acetate O with the distressed snow folder and cut out the resulting snowflake. It's right there under the R and the O - see?! (Aside: I have lots of those chipboard centre pieces from A’s, D’s, O’s, P’s, etc hanging around in my stash waiting to use on something one day, so I was pleased I came up with this idea for the acetate!)

After putting it all together I realised that I had nowhere left to journal so used more of the same papers to cut out the three pieces on the bottom left using my Papertrey Ink dies (fillable frames #10 and Limitless Layers: 1 3/4" Circle Collection). I covered one with the same white mulberry paper, dry and heat embossed the other, and wrote the journaling on the third piece.

Altogether I really like how this turned out, and I hope you do too.

Till next time, happy days!

Francine