Close to my Heart scrapbooking and cardmaking products

I'm an independent Close to my Heart consultant! If you're interested in our wonderful line of products, you can check them out or order online on my website at: Francine.cmth.com.au


Showing posts with label ATC. Show all posts

4 January 2014

More Catching Up

Here's some more catching up!

During National Scrapbooking Day in October my friends at The Crop Room, an online group that I belong to, and I made a number of cards for challenges set by the lovely Sue. I'm not a real card maker, but usually try to participate in these challenges and make a few. I don't ever buy anything special, but mostly use up scraps from my stash and stamps that I have purchased over the years. This year because I have started selling Close to my Heart (CTMH) products, I used some of that for many of my cards too.


Here's a look at what I finished.

Challenge: Use yellow, orange and teal.
Uses scraps from my stash.


Challenge: make a one layer card. For this card I put ink inside the embossing folder before embossing the butterflies. It was a bit plain, so I added the music background (Darkroom Door) and more ink around the embossed butterflies, the swirl and the sentiment. In the end I didn't like it at all and had another go at this challenge!


Challenge: make a one layer card - take 2. Ahh, much better! 
This card uses all Close to my Heart products:
White Daisy cardstock 
Love Life stamp set 
Tommy Workshop stamp set 
Enchantment pigment inks (smokey plum, goldrush, olive and indian corn blue)


Challenge: Make a Thanksgiving card
The card base is Close to my Heart Colonial White cardstock. I used TLC paper scraps and Stampin' Up's French Foliage stamp set with CTMH Goldrush, Olive and Barn Red pigment inks from the Enchantment Pigment ink set. 


Challenge: Quick sketch challenge. Uses all CTMH products-
White Daisy cardstock base
Exclusive Inks stamp pad - Cotton Candy


Challenge: Make a card with a repeated stamp pattern
Made using CTMH Colonial White cardstock base with Whisper cardstock embossed with Stampin' Up's hexagon embossing folder. Indian corn blue pigment ink from the Enchantment Pigment ink set. Star stamps from the Love Life stamp set. Happy Birthday sentiment stamp unknown maker. 


Challenge: sketch
Laughing Lola Workshop on the Go - including papers, stamp set and black hemp twine. 
Exclusive inks stamp pad - Black and Lagoon


And finally, here are some things I made for the Close To My Heart open house/launch I had at my house demonstrating some of the products.

Card: i ♥ you 
White Daisy cardstock base
Whisper cardstock 
Exclusive inks stamp pads - Lagoon and Cotton Candy
Lagoon Houndstooth washi tape


ATC: Love lives here
Colonial White cardstock base
Love Life stamp set (words and hearts)
Frame Flair stamp set
Exclusive Inks stamp pad - Lagoon and Desert Sand 
Stitch Guide ruler (I love this tool!)
Corner rounder and DMC floss


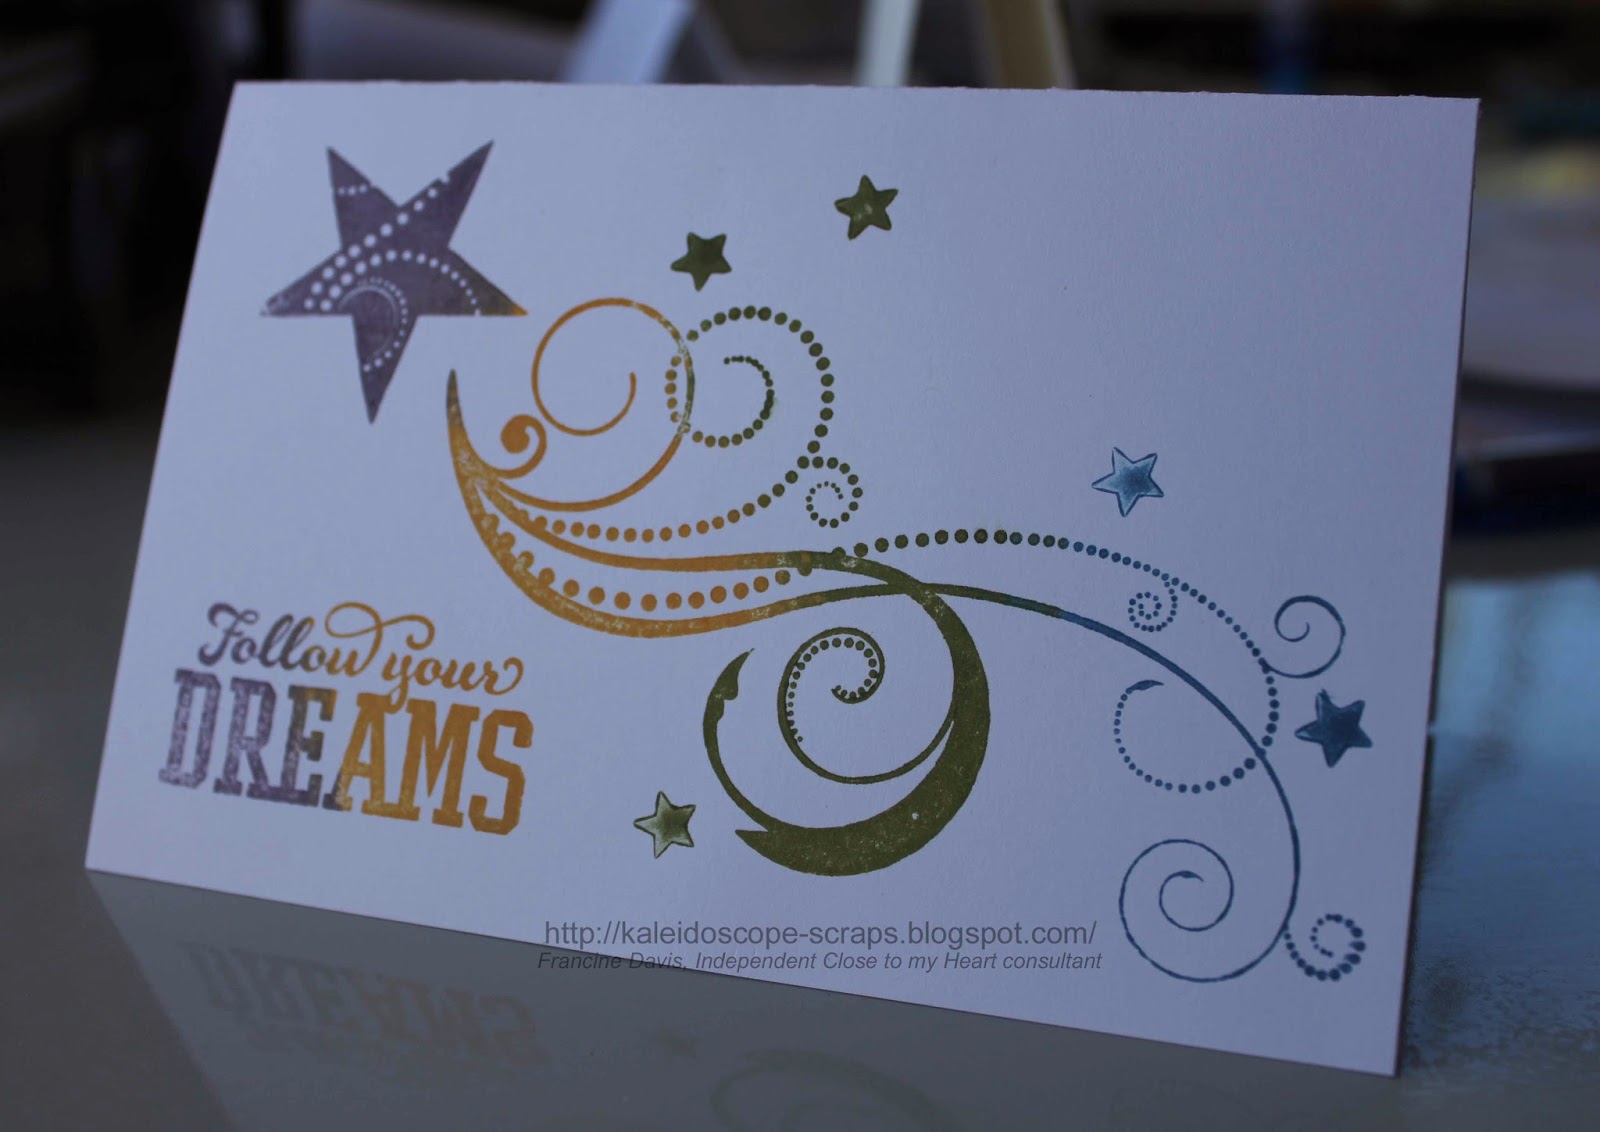
Card: Follow your dreams
White Daisy cardstock
Black cardstock
Whisper cardstock
Tommy Workshop stamp set 
Exclusive Inks stamp pad - Black , PearLagoon and Desert Sand
Round sponge


Stitch Sampler
I so love the Stitch Guide ruler - probably has to do with the fact that I was a cross stitcher before I was a scrapbooker, LOL! Anyway, I thought it would be good to show all the stitches available on the ruler so I just started punching holes with the ruler and then stitching them with DMC floss from my stash. I also added a few stamps to show that the two things can go together. 

Colonial White cardstock on top of a Black cardstock base
Stitch Guide ruler
Exclusive Inks stamp pad - Desert Sand and Pear
Love Life stamp set (cherish)
Sarita Workshop stamp set


I hope you enjoyed seeing some of my projects - please leave me some comment love if you did . Till next time, happy days!


8 April 2012

Keys ATC


I've been swapping ATCs for about two years now with my friends on The Crop Room but I don't often blog about them. Today I had to make seven with the theme "door". My mind went from door to welcome mat, to key under the mat, to just key so this is what I ended up with in the end. I love the result and got to try several techniques I haven't used before.

Here are the products I started with. (I realised after I had already put them away, that I forgot to include the crackle medium, Kaisercraft key stamp, Cheery Lynn Heartland America heart die and black Stazon Ink in the picture.)  
I started by making the keys. I painted the chipboard with black acrylic paint and as soon as it was dry I painted on some crackle medium. While they were drying I made the ATC bases. I cut up some leftover book board/light chipboard that I had used to organise my cutting dies. I inked them with the three colours of Distress inks, then splashed some water on them. I dried the water marks with a heat gun, then using the Stazon ink I stamped the keys background stamp on and then the bases were finished.

By this time the keys were dry and I put some of the bronze versamark ink on them, wiped a bit off, then stamped some more on.
For the extra embellishment I cut up some leftover pieces of kraft cardstock with the heart die, but only the circle "flower" parts in the top of the die. I inked them with a little bit of the fired brick red distress ink and then put a bit of the bronze Versamark ink over top of that.
I tied the jute bows and attached them into the holes at the top of each key with some red liner tape. I then put the cards together. As there were only four of each design of key in the pack, the keys face different directions so the ATC's aren't exactly the same, but then I guess multiple handmade things never are.

I'm very pleased with the final result and I'd love to hear what you think.
Till next time, happy days.
Francine 

11 October 2011

Online crop weekend - part 1 - OTP/ATCs

This past weekend I had the pleasure of participating in an online challenge weekend with my "Crop Room" scrapping buddies - mostly women in the US, but at least one friend from NZ as well (hi Lainie!). The crop was in celebration of World Card Making Day, even though it was a week late! There were 25 challenges in total - mostly cards as well as four layout challenges and four ATC/OTP challenges. here's what I made for the OTP/ATC challenges.


Challenge 1 - Create a flower from scratch.
I used this video tutorial to make a ric rac flower. While I liked the result it was smaller than I anticipated and so I added to it by punching two retro flowers, layering them together and adding the ric rac flower as the flower centre. I love how it turned out, and it was quite simple and fast to make too so I ended up making four flowers in the end :-)


Challenge 2 - Create a Halloween tag
The tag had to be at least 2.5" wide x 4" tall. Mine is 3.25" x 5.25". I used a TLC Halloween kit from my stash for the main embellishment on this tag. I was unlikely to ever use the kit since Halloween isn't a big thing here, and figured that even if I did want to use it, I could put this tag on the layout if I needed it!
Challenge 3 - Make an ATC with the theme "fly"The ATC could be of anything that flies except a bird. Since I liked this theme I made two ATC's, both about butterflies. Here they are!

The red one uses my new favourite Marianne Creatables butterfly die, Vintage Vogue stamp set from SU, and Cuttlebug typewriter alphabet die. I stamped the border stamp across the bottom, sprinkled on Stamp n Bond powder, heated it, then added the silver glitter. For the wings I put some double sided tape under the 'holes' I wanted to glitter then sprinkled the glitter on. 
The pink ATC uses a SU stamp set called Great Friend. I found the quote online and printed it directly onto the cardstock.
Challenge 4 Make an ATC with the theme "Mother"

For this ATC about Mother Nature, I printed a quote I found online directly on to the ATC, and stamped the green flourish leaves using the Vintage Vogue stamp set mentioned above. The medallion was made from one of my kaleidoscope cards and cut out with the EZ Cut - Fold Flower 5 die. The original kaleidoscope is shown below. 
Grevillea card
www. MemoriesInKaleidoscope.com
I hope to do another post later about some of the other things I made on the weekend.

Till next time, happy days!

Francine  

24 October 2010

Six Artist Trading Cards

In July I participated in my first Artist’s Trading Card (ATC) swap with my friends on CRII. For those of you who have never made an ATC before, they are small cards - 2.5" x 3.5" in size. They began as ways for artists to trade information, but many different kinds of artists, including scrapbookers have started making them now. In scrapbooking/card making circles they make great swap items as they are relatively easy and quick to make. These are the first ones I have ever made, and I think I'm hooked now! (You can see some great ATCs on this blog.)

But back to my story... In the first swap I took part in there were two strings with 9 people in each. The first challenge string was to use a button on the ATC. Here’s my take on it.

It was made from scraps that I had. I stamped the SU! butterfly stamp onto a piece of white cardstock with some rainbow ink that I had not used in years. I cut the butterfly out, then stuck it to a piece of yellow gingham paper which I had rounded the corners of. I strung some seed beads on to make the butterfly body, and sewed some antennae on with silver thread. I sewed a silver swirl onto the patterned paper and added the requisite button. I stuck the patterned paper, butterfly and button onto some yellow cardstock and wrote the word Life in purple pen on the side. I finished it off with a doodled border in purple pen.

The second challenge string was to make an ATC using black and white and one other colour. I decided to use gold. I had an idea, but when I started to make it it turned into something completely different! In the end, this is what I made.

I stamped and embossed the angel onto scrap white cardstock, then cut it out. I printed the saying “Friendship is a knot that angel hands have tied” nine times onto white cardstock. I overstamped it in gold ink using my “En Français” SU! stamp. I punched it out with a SU! label punch and drew a border around the edge with gold pen. I then made a friendship knot from gold ribbon. I used these instructions.
After cutting the black and white patterned paper (from my TLC stash), I distressed the edges and attached it to the black cardstock base. I added the angel stamp, the friendship knot and the saying, which I attached with gold eyelets and rhinestones. I stitched a small corner using daisy chain stitch in gold thread, and added a gold photo corner sticker. This was my least favourite of the two ATCs I made, mostly because it didn’t turn out how I had envisioned it in my head.

I really enjoyed the whole process of making the ATCs and was keen to participate in the second swap in August/September. There were 9 people again participating in two strings. The theme of the first string was “hot pink and orange”. I decided to use the new Kaisercraft flourish stamp I had recently purchased. I wanted to try using the emboss resist technique. Unfortunately it didn’t work the way it was meant to, probably because I was using the wrong type of ink, but it still turned out ok. I ended us stamping everyone’s initials in hot pink and cutting them out. I attached each letter along with a felt flower from the Flower Fusion set from SU! using a brad. Finally I attached the stamped design to a piece of hot pink cardstock. I think these turned out really nicely.

The fourth cards that I made were about birds. These are my favourite ATCs of the bunch. I printed the saying “It is not only fine feathers that make fine birds. ~ Aesop” onto some green SU! patterned paper. Then I just started adding feathers and cardstock leaves punched out with the SU! two step bird punch. I finished each ‘nest’ with a little cardstock bird from Scrapmatts which I had coloured with my Sakura pens. Each ATC was slightly different because of the feathers, but each one turned out nicely. It was hard trying to decide which one to keep for myself! Here’s what they looked like.

This month, I entered another ATC swap at CRII. There were only 7 people participating this time. The theme for the first string was Pink & Lime, a Tropical Christmas. For some reason the first thing that came into my head was palm trees. So I set out in search of palm tree clip art to download from the internet. Sadly I didn’t record where I found this tree (so if anyone can tell me, please do so I can give proper credit). I printed seven copies on thick white card, and coloured them in with my watercolour pencils, then cut them out. I stuck them to the pink cardstock, added a little bell with lime green floss, and stamped a Merry Christmas circle stamp (maker unknown), with a small square stamp from studio g (VC0012 Series 32) and inked the edges of the card, all with SU! green galore ink. I added a bit of sparkle with my pink Sakura star pen to some of the stars between the Merry Christmas words. Here it is.

The last ATC that I made is one of my favourites. The theme was Gothic Arch. There are some absolutely stunning samples out there on the internet which made my first attempt look absolutely juvenile. I ended up redoing them. I printed my saying “open your heart and let your love fly free” onto some green TLC paper from my stash. The font I used is called Angelic War. I can’t find any reference to this saying anywhere. As it just popped in my head, I’m thinking that I made it up, please correct me if I’m wrong though! Anyway, I cut the words out and used my distressing tool to distress the edges of the paper. I then stamped the SU! kiwi kiss green cardstock with clear Versamark ink. I used the butterfly, flowers and swirls stamp from Autumn Leaves Block Stamps 2. then I cut out the gothic arch shape from the cards. Next I stamped the border stamp from SU! vintage vogue set in bronze versamark ink along the bottom of each card. Then I stamped the flower swirl stamp from the same set at the top left side of the arch. I punched the hearts from some scrap paper from my stash and then it was time to put it al together. I added a gold heart brad to the cards, then realised that I was 3 brads short! I ended up using Stamp N Bond to add glitter to the brads. Then the gold ones didn’t look good anymore, so I glittered them too. I added some pink coloured wings, antennae and a little trail to each brad so it looked kind of like an insect. When I showed the new card and the old card to Logan he said the new ones were a gazillion times better! I agree! I hope the ladies like them.

I’d love to know what you think of my ATCs. Please leave me a comment, I love reading them. It’s great to know I can share my work with people all over the world through my blog.

Till next time, happy days!

Francine