Close to my Heart scrapbooking and cardmaking products

I'm an independent Close to my Heart consultant! If you're interested in our wonderful line of products, you can check them out or order online on my website at: Francine.cmth.com.au


Showing posts with label Scrap the Girls. Show all posts

15 March 2014

So Very Loved

I made this layout for the March Scrap the Girls Challenge to use either hearts and/or doilies. I love my doily dies so that part was easy! The papers and embellishments I used were mostly from the monthly paper and embellishment pack from my local scrapbooking store, Wrapped in Paper, with a few things added from my stash.

The picture is from my daughter's year 12 formal last year. I think she looked gorgeous and I love this picture! I'm glad I finally got to scrap it.

Kaisercraft collectables,
burlap and other die cut flowers,
etc layered together 

doilies, flowers and other die cuts
 layered on top of each other
I love layering papers and embellishments and this layout was no exception. The dies I used to cut the various layers were:


Half die cut, half fussy cut title
I am particularly happy with how the title turned out. "So very loved" and the red flower were part of a 4" x 6" panel on one of the papers. I fit the MFT Die-Namics Clearly Sentimental Label over the words part and then only cut it out to the beginning of the flower. Then I simply fussy cut the rest around the flower and mounted it with foam squares. I think it looks great. 

I'd love to hear what you think, so please feel free to leave me some comments ☺

Till next time, happy days!

26 April 2013

Scrap the Girls


I don’t think I've entered a layout for Scrap the Girls yet. I've looked at the challenges before but that's about as far as it's gotten! So, I decided to change that this month and made this layout with a photo of my mother-in-law and sister-in-law. It was taken at my father-in-law's recent 90th birthday party. My mother-in-law looks so happy and you can't tell in this picture that most of the time she's in a world of her own. It's so sad what dementia has done to her.

I'm really pleased with this layout! I love the colours and the final result. My only problem was I couldn't come up with a title, so for the first time my layout has no title, but I don't think it matters.

The challenge at Scrap the Girls was to scrap a picture (of a girl, obviously!) and use hexagons, buttons and paint/mists. These are not things that I use often (or ever in the case of the hexagons ☺), so it was a great challenge for me.

I started with a sketch by Beck Fleck from Page Maps from September 2011.

I had just bought a hexagon embossing folder (Stampin' Up!) so embossed a piece of black paper and then cut out a single row of hexagons from the embossed paper. I added a bit of gold paint with my finger and put them in place of the row of thumbnail photos in the sketch.

I added some gold paint to the flowers as well. The other paint I used was through a chicken wire template (The Crafter's Workshop ChickenwireTCW239). That ended up being hexagons too really.  

The black lace was left over from an LSS monthly kit and I added some gold ribbon too. I didn't have any ribbon wide enough to go over the end of the patterned paper on the right hand side and felt that it really needed something. But I happened to notice a pack of glitter paper in the mess that is my scrap room and realised that I could just die cut a border. I used the MFT Die-namics faux crochet border die (twice to make a full 12" border and covered the join up with the button).

I think with the exception of maybe one, all the buttons on this layout are from my mother-in-law's
stash! When we cleaned out my in-laws' house before her move to the nursing home I inherited about six jars full of buttons. Rather fitting I think that I used some of them on this layout considering it is about her. Those that had shanks on them I cut off. Unfortunately the shanks didn't exactly come off flush with the bottom of the button and so I attached them with some foam tape. Those with button holes I threaded with some gold ribbon/cord before adding them on to the page with double sided tape.

See the gold pen?!
I used a gold gel pen to add a few dots of gold on the patterned paper. You can see some in some of it in the close up photo. I also coloured the scalloped edge of the patterned paper, and the "pie quarter designs" in that paper too.

I made two swirls from some gold coloured wire, as well as adding the left over pieces of a black rhinestone swirl that a friend had given me (thanks Lainie). There are a few red rhinestones scattered about as well!

All in all, I'm very pleased with this layout and hope you like it too.

Till next time, happy days!
Francine

20 August 2012

Grandchildren - Youngest and Oldest


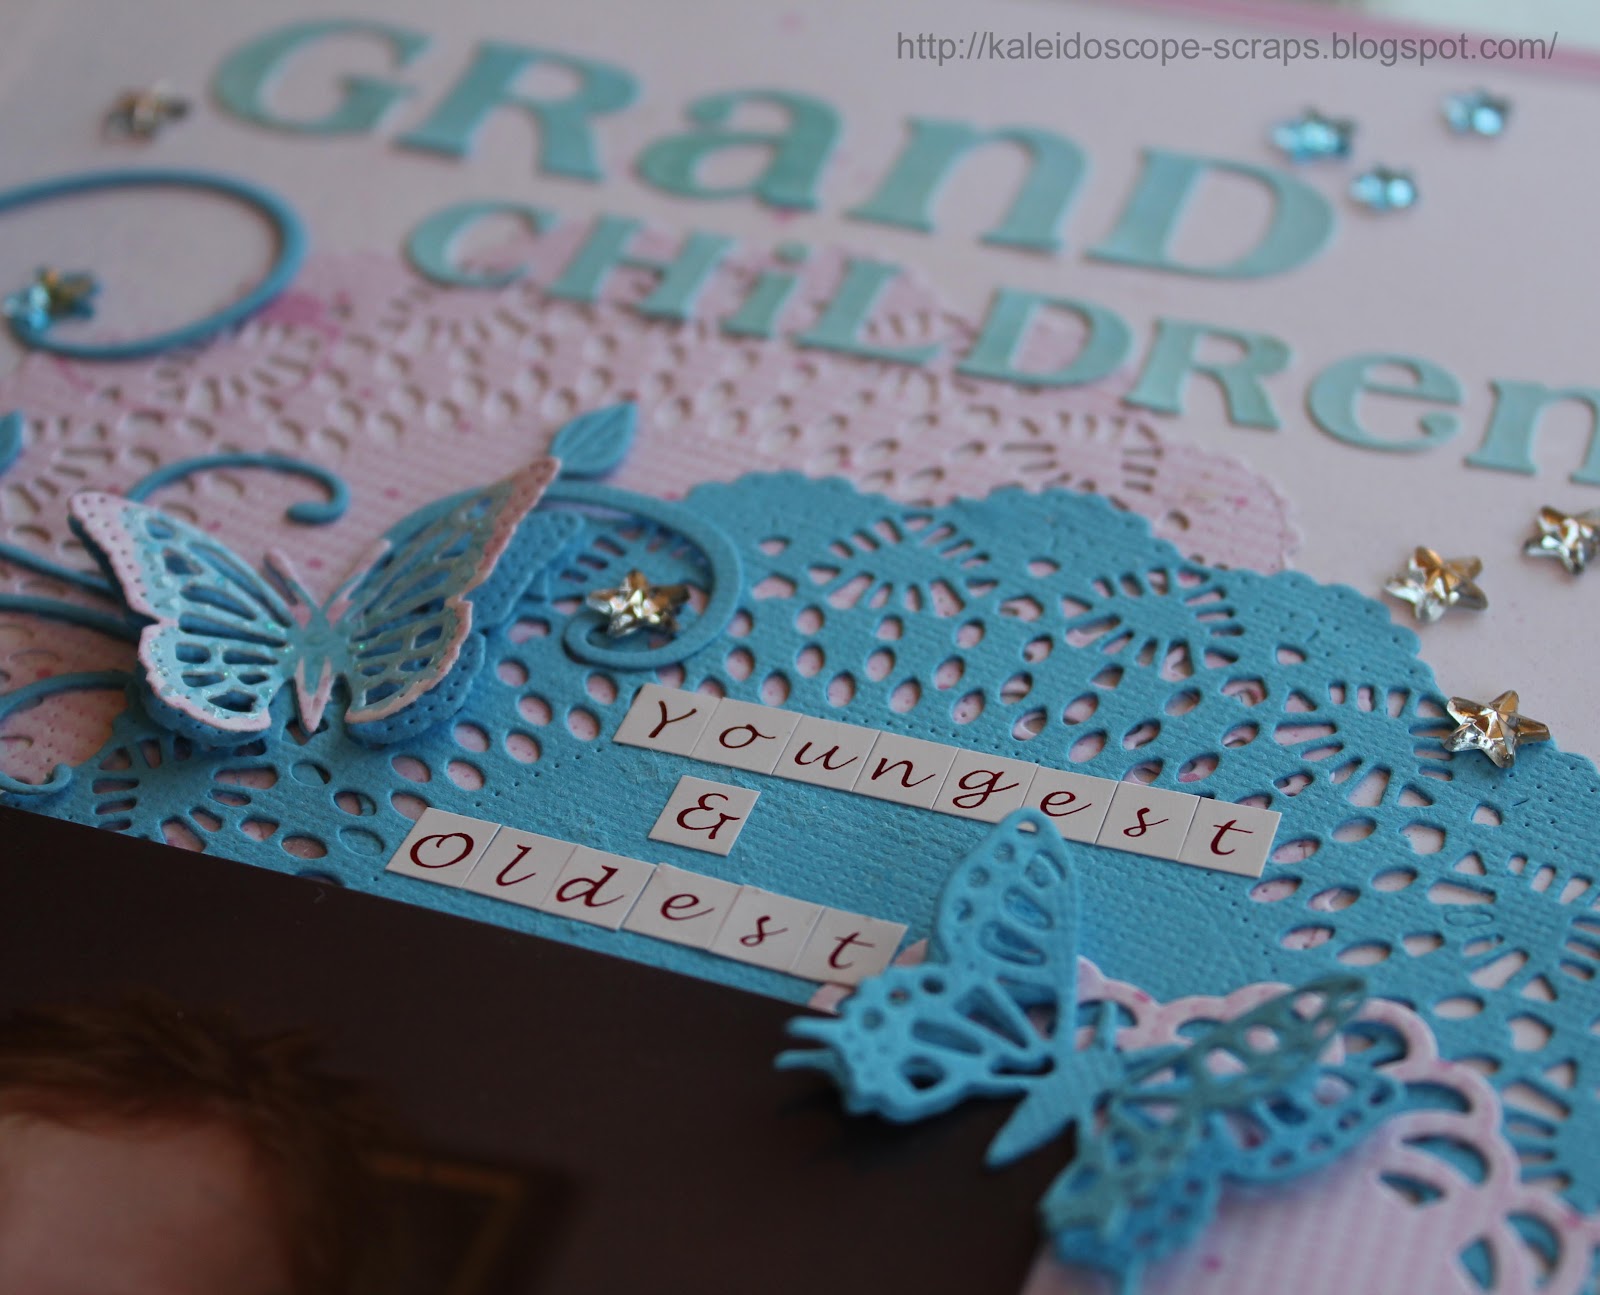
Here is my layout for this month's Scrap the Girls challenge. I used the monthly paper kit from my LSS, Wrapped in Paper, which just happened to have blue bling stars in it. I had some more pain ones I could add as well and so this layout was born.
Initially I was going to fussy cut the centre out of the paper as there was a frame of swirls and butterflies surrounding the paper, but in the end I decided against that when I found this sketch by Nadia Canizzo.

The girls in the photo are my nieces. This photo was taken at my family reunion in North America last month, and it just happens that the little one is the youngest grandchild, and the older one is the oldest grandchild. I think it's a beautiful picture of them both (not that you can tell with the pixellated faces, LOL!).


Fussy cut butterflies
As usual, I used my Big Shot and cut out the large doilies, and the smaller doilies, as well as the fanciful flourish from both the patterned paper and the blue cardstock. I also cut a few butterflies with my dies, as well as a couple of fussy cut ones from the paper. There is a partial label in the top let corner as well.
clothes peg body

The lace and flowers were in the kit, as was a small clothes peg. I took it apart, sprayed it with glimmer mist, tied some floss around it, and used it for the butterfly body. I also cut some large butterflies with my favourite butterfly die from Marianne Creations (LR0115), and used them as masks on the white cardstock background which I sprayed with blue and pink glimmer mist.  

For the title I used some Basic Grey ice blue letters. They weren't  really the right colour so I sprayed them with the same blue glimmer mist as I used on the background. The blue didn't come out the same, but at least it was closer than any of the other many alphabet letter stickers I own! 

Misted background
Please leave me a comment - it makes me feel that someone out there really is reading this, and anyway, I'd love to hear what you think of my layout.

Till next time, happy days!

Francine

30 January 2012

(High School) Friends Together


Here's my latest challenge entry for the Scrap the Girls monochromatic challenge. I really enjoy doing monochromatic layouts. Looking for papers and embellishments from my stash that are all the same colour is fun - once you decide on the colour, that its! I picked green for this challenge because that was the colour of my daughter's jewellery, and because of the trees in the background of the photos. 
In my post about my White on white layout I explained that I have recently received a number of die cuts and embossed papers from a swap on the Crop Room. So I went looking at those swap items again and found the swirl embossed paper, the owl and the leaves. All three pieces were larger A2 embossed papers, generally meant for cards. I cut them up though, and used the rest of the owl for the mat under the single photo in the top left corner. Part of the non-embossed part of the leaf piece I cut with my wonky scalloped border die for the base of the title. 
The embellishments:
buttons: Beutron
flower brads: unknown
floss: DMC
epoxy photo corner: Making Memories (from a Christmas set)
layered flower: unknown die cut, TLC Poppin Pieces flower, button and floss
large flower: unknown, but I put a Fancy Pants rub on on it
letters: Kaisercraft, Basic Grey
metal 'together' ribbon slide: unknown
rhinestones: Kaisercraft Basics
jute: coloured with Bamboo VersaColor ink. Note: I threaded the two buttons onto the jute through two diagonal holes. Then I taped down the buttons in the corners of the "frame" and taped jute on the underside of the cardstock. Then I marked where the other two holes in the buttons were and pierced two holes. I threaded a short piece of jute through these holes and tied it off on top of the button. I thought this would help to secure the jute "frame" in place. 
ribbon: unknown, but this was the ribbon my daughter wore in her hair when these photos were taken
mini bows were made with a fork, with this fabulous tutorial 


I used a Becky Fleck Page Map as the basis for this layout. It's the current sketch on the Page Maps challenge blog, but since I can't enter that challenge, I used the sketch for this one instead. I started off fairly true to the sketch but diverged a bit as I went on. All in all though, I really like the final outcome. Please leave me a comment and tell me what you think!
Till next time. Happy Days!
Francine