Close to my Heart scrapbooking and cardmaking products

I'm an independent Close to my Heart consultant! If you're interested in our wonderful line of products, you can check them out or order online on my website at: Francine.cmth.com.au


20 February 2013

Be Bold!


I managed to complete the quickest layout ever last night. From when I read the challenge to "be bold" on Frosted Designs to when I finished the layout was only a few hours. I'm sure that's not that quick for some of you, but for me it's a record!!

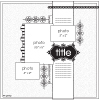
The challenge made me think about bright colours and young children, so I went "old school" with the photos as my son called it, and grabbed some play photos from 2005. I haven't scrapped many photos from when my kids were younger so it was kind of nice to dig up an old TLC Hot Fudge (havin' fun) kit and use some of my plentiful TLC stash. The colours were very bold and bright, and once I picked the sketch by Becky Fleck from the Scrapbookand Cards Today Fall 2010 bonus sketch collection I was away!


I turned the sketch 90o and the whole thing came together incredibly fast. I used just what was in the kit: cardstock, papers and die cuts. My only additions not from the kit were the many brads that have also been languishing in my stash for way too long. these provided some texture/height and also satisfied the the challenge at Use it Tuesday to use fasteners. Their challenges to use up your stash are certainly not a problem for me when I have so much to choose from! I'd say that nothing that I used for this layout is newer than maybe seven years old.

 
So, maybe I've found a new quick scrapping style, but I suspect that I'll be back to hours and hours of consideration for my next layout. We'll see.

Till next time, happy days!

Francine

16 February 2013

Cooking School


Today I've got a double page layout to share. It's about the cooking class we took while we were in Bali. It was such a fantastic day! Those of you who know me will wonder why we took a cooking class when I so hate cooking! But, this was a culture and cooking lesson combined. We started the day at a local (non-tourist) market looking at all the different foods and items for sale. Our guide/host, Made Sang, explained the uses of various items and we tasted some fruits that you can't get in Australia. Afterwards he took us to his family home and explained how the compound was laid out as well as several Balinese (Hindu) traditions. Then came the cooking class with his brother, Dewa. We kept busy with different tasks and it was a lot of fun. Before we could sit down to the lunch that we made we learned about the daily offerings that happen before you can eat. We had to get dressed in sarongs (tied a certain way for men and differently for women), then made our way in to the family temple in the compound. His mother made the offerings while we watched on. Then finally we had the most delicious lunch, with everything made from scratch by our own hands! I would certainly encourage any of you thinking of going to Bali to book in for a class with the Lobong Cooking School. It's a wonderful experience!

But, I digress, back to my layout. I used two different sketches for two different challenges and put them together to make the one layout. The sketches were quite different, but by using the same papers and types of embellishments, I think they flow together quite nicely. I also had some embellishments which I put across the top of both pages to join them together. 


The left hand side is based on a sketch from Stuck?! Sketches. The sketch was an 8.5" x 11" sketch, so I just extended it to fit the 12" x 12" format. I added the title and journalling after I finished embellishing, and this is my only regret. In hindsight I think I should have waited with all the washi tape I added until after I put the title and journalling on. I may still change it and remove one line of washi tape and bling, I'm not sure. Here's the page and some close ups.
 

Turned 90o to right
The right hand side is based on a Page Maps sketch for a challenge at Scrappin Patch. I turned the sketch 90o to the right. In place of the title on the sketch, I used the little paper bag that we received at the end of our class. It held a bottle of coconut oil which we'd seen made that morning, as well as the booklet of recipes from the day. I cut the back off the bag and stuck it down to make a pocket for the recipe book. I used the other twine handle for the centres of my doily embellishments. Here's a look at the right hand page and some close ups from that page.


Recipe book out of the paper bag pocket


Ingredients on the pages are:
Cardstock and patterned papers - Stampin Up! (Urban Oasis)
Washi tape - Black and White tulip
Letter stickers - Basic Grey Fruitcake
Bling - Glitterazzi
Cutting dies (from virtually every company I own a cutting die by!):
My Favorite Things die-namics - Prima Donna Petals
Spellbinders - Fleur de Lis squares (I used the smallest square combined with the smallest plain square from the Nellie Snellen die in the centre to turn it into a frame)
Nellie Snellen - MultiFrame round Lilly (MFD030), Multi Frame square (vierkant - MFD012)

I welcome any comments or questions you might care to leave J.

Till next time, happy days!

Francine

4 February 2013

Bali layouts


Beware! Long post coming up…

Last year I was lucky to get a layout a month completed. So far this year I've completed five, including one double - and all since our return from Bali on January 17th! Boy, am I on a roll. So here are three of the Bali related layouts.


I turned the sketch 90o to the right
The first is my entry for Sketches With A Twist. The challenge this month is to use the sketch provided as well as texture paste. I bought some texture paste late last year wanting to try it so this was the nudge I needed to actually do it.

Texture paste
Washi tape strips
acrylic heart behind the flower with sequins and bead centre
I had some washi tape on my desk that I hadn't yet used either so that was what prompted me to choose the colours for the layout.  First, I used a template from The Crafter's Workshop (Tile Texture TCW237) to put the texture paste through. While I was waiting for it to dry I covered a scrap piece of white paper with lines of washi tape to make the arrow. Once the paste was dry I put it all together. I added some patterned papers from my stash (TLC and Basic Grey), the Bo Bunny flowers, some white sequin leaves and a clear flower bead for the centre, an acetate heart (Breezy/TLC) behind the flower, more washi tape strips, a white brad and a white clip, some white foam letter stickers and Kaisercraft mini letters for the title and it was done! Cool - I love it and it's now the title page for my Bali album. And, surprise, surprise, there's not a single die cut on it - I never once pulled out my Big Shot!!


This is my double page layout. I love the panoramic photos. It helps that the rice fields and terraces in Bali are so photogenic (can you say that about a landscape?). I didn't even use a sketch for this one, and only two die cuts that I had already cut out that were in my stash! Embellishments are all bits and pieces from my stash as well so I have no idea where they're from, but I love how it all came together. I think this is one of my favourite layouts.


Beside the Tirta Empul layout (which you can read about here), my other Bali layout is one I made with the February Wrapped in Paper monthly challenge kit. I certainly wasn't enthusiastic about the papers in the kit and wasn't sure what photos to use them with. As you have to use at least a little bit of each one, in the end I decided to use the words (My Girl) for the title, which meant it had to be about Kyaa. It became My Bali Girl though and I included photos of Kyaa and some of the activities we tried while we were in Bali.


Everything on the layout is from the kit, and for once I didn't add anything to it. The papers and matching embellishments are from the Butterfly Kisses collection from Kaisercraft. The butterflies are printed on the paper and partially die cut so you can pinch the wings up. I'm not sure whether all the papers are the same, or I just happened to get a dud version, but the cuts were completely off from where the printing was. I certainly wouldn't have purchased this paper if it hadn't been in the kit. Anyway, I struggled with it a bit as to how to use it, but in the end it just kind of fell into place and I'm pleased with the result. Certainly not colours and papers I would have chosen, but I always find that it's amazing what you can come up with and how you can turn something you don't really like into a layout to be proud of. It's currently on display at Wrapped in Paper, so if you're headed that way this month I'd love it if you voted for me if you like I too.

Till next time, happy days.

Francine

17 - February White with 1 challenge


Here's my layout for February's White With One challenge to use white + pink + hearts. (Hmm, I'm not sure why there's a shadow down the bottom in the middle, it's not there IRL!)

I already had these photos printed and a sketch picked out (from the September 2012 My Creative Sketches challenge) but it hadn't gone beyond that. This seemed like the perfect way to pick the papers, despite the fact that Kyaa hates pink. I'm really pleased with how it turned out - even Kyaa didn't mind all the pink!

The pink papers are from an LSS challenge win, along with the lace. The stick on pearls and hearts were from my stash, along with the striped paper which is actually a tag from some hair clips. I die cut the title and the two little hearts from it. The silver heart was on the tag already and I liked how it looked with the die cut negative above so I just cut the narrow strip and rounded the corners from the larger tag that it was. I don't throw anything out and eventually it comes in handy like this, or at least that's what I keep telling myself when I look at all my stuff, LOL!

The dies I used were:

Cheery Lynn Heartland of America die (large)
Memory Box Serafina Heart (98278) and matching Cupid Heart (98281)
MFT Die-namics heart from Notched tag set

Till next time, happy days!

Francine

26 January 2013

Tirta Empul


The last Bird is the Word challenge word for a while is "Whisper". I did what I often do for these challenges and looked up quotes with the word whisper in it. I found this one from Ralph Waldo Emerson: "Let us be silent that we may hear the whispers of the gods" and thought of our visit to the Tirta Empul temple at Tampaksiring in Bali, Indonesia. Despite the rainy day the quietness of the place really struck a chord. So, I added the quote on top of on of my photos of a woman praying in the temple (font is Angelic War).

For once I made this layout without a sketch to start with! I wasn't sure how big to print the photos to begin with. So, I placed them on a 12"x12" canvas in PSE first to determine the sizes and layout, then printed them out.


The patterned papers are from Kaisercraft Old World collection (discontinued), and the kraft cardstock is from Stampin Up! I inked the edges of everything with Faded Jeans Distress Ink. Since there was a large ship in the bottom corner of the white paper, I covered it up with a doily die cut (Cheery Lynn English tea party doily) from a coordinating paper. Under the title (cut with Sizzlets Cherish dies), I punched holes in the paper using the Mijemoo Flip it brads n eyelets guide and was going to try and sew with the jute, but that was too thick, so instead I just brought the jute up through the paper at the ends and sewed it in place with floss wherever the holes were. I added some washi tape and a few brads (Kaisercraft and Making Memories [Noteworthy]) and I was done.


The only thing left to do was to add the entrance ticket. I wanted to include it on the layout, but it was too large so I resolved that problem by sliding it behind the main photo.

I like how this layout turned out and hope you do too! Please leave me some comment love to let me know what you think.

Till next time, happy days.

Francine

1 January 2013

Frosted Designs 12 Day of Christmas Challenge


Front of birthday calendar - interchangeable months
Back of birthday calendar - pages interchangeable like the front
Frosted Designs had a 12 days of Christmas challenge with 12 different challenges to be completed by Dec 31st. I had seen two pins on Pinterest that intrigued me, of Christmas advent calendars made from an IKEA photo frame. The last time I was in Sydney I went to IKEA and bought myself a frame but that was as far as it got. This seemed like the perfect opportunity make a birthday calendar based on the advent calendar idea. With 12 months and 12 challenges it was perfect (although I did change the way the calendar worked)!

I managed to complete 10 of the 12 challenges so far and hopefully will get an opportunity to complete the other 2 as well. I have all the months except August and December completed. I used the same packs of papers from Creative Memories (Enchanted - printed papers and embossed cardstock) for the project. All the month titles were die cut out of these papers using my MFT Die-namics By the Letters cutting die.

Here are my challenge entries: 

January - Challenge #3 - use three mists, paints or inks

Along with the mini numbers collage template (TCW210s) from The Crafter's Workshop, I used three Distress inks (peeled paint, fired brick, and weathered wood) to make the background on a plain part of one of the papers, then cut out a vine from the edge of the paper to lay on top.

February - Challenge #12 - use at least 12 brads

I die cut the heart with my Cheery Lynn Large Heartland of America die (using only the small heart part), and a vine with my Fancy That Leafy Vine die. I then used a Mijemoo Flip it brads n eyelets guide to place the 24 (!) black brads for the heart shape.

March - Challenge #1 - use a bird

A friend had sent me a bird cage die, so along with the Stampin Up! two step bird punch I cut out a bird and several leaves for this month.

April - Challenge #4 - use four different patterned papers

An easy challenge! I actually used five patterned papers for this one when you include the background paper. The branch was die cut with the Memory Box Woodland branch die (not that you can see much of it anymore!), and the leaves were cut with the Fancy That Mixed Leaves die.

May - Challenge #2 - use two stamps

Using distress inks, I stamped the Stampin up! En Francais and Medallion stamps on the embossed cardstock, before adding the month title.  

June - Challenge #6 - use six strips of washi tape

This one was difficult for me. I wasn't sure how to incorporate the tape, especially as I only had a limited supply of tapes (four to be exact and two with clashing colours!). Then I remembered the Fancy That Sprockets and Gears die and the tape seemed to go with them. I laid down the six pieces of tape (three above and three below the title) and put the cogs on top, and in the end I love how this one turned out!

July - Challenge #7 - use seven sparkly snowflakes

While it rarely snows in Canberra, July is winter and many of our friends go to the snowy mountains to go skiing then, so that seemed to be the most logical month for snowflakes. I cut two larger snowflakes from white paper with the Marianne Design Creatables snowflake die, then punched the smaller ones with a Creative Memories punch. I painted the smaller flakes with moonlight Smooch and added some bling to the centre of each one. I tried to distress the edges of the page with white versamark ink, but it just seemed to soak into the cardstock so I ended up painting some streaks of the smooch onto the background to look a bit like falling snow - well that was the theory anyway!

August - not done yet - intending to use challenge 8 - use eight different brands/products on your project

September - Challenge #10 - use 10 buttons

Another easy one, and one of the first ones I completed. I simply die cut 10 flowers with my Joycrafts daisy die, then added buttons to the centre of each. Having recently been involved with cleaning up my in-law's property for sale, I 'inherited' quite a stash of buttons so had many to choose from! I added a butterfly (Cheery Lynn small exotic butterflies die) for a pop of colour.

October - Challenge #9 - use 9 pearls or sparkles

I added 9 pearls to the Marianne Design Creatables (LR0115) butterfly die cut and T in the title. 

November - Challenge #11 - use 11 banner flags

OK  so I actually have 12 banner flags on this one. I was intending to use the Fancy That Fiesta Flags for the banners on this one, but they were too large, so I had to use the MFT Die-namics Mini Pennant die instead. But then I felt the top right corner was a bit bare so I used one of the fiesta flags that I had already cut to fill it up.

December - not done yet - intending to use Challenge #5 - use five gold things.

Now all I have to do is finish the last two months and make a box to keep the other months in while one is on display. What do you think? I'd love to see your creations if you make one too...

Till next time, happy days!

Francine